 Questions and requests
[Creating Questions/Requests]
If you have any questions or requests regarding the instance, set up your questions/requests.
The Questions/Requests tab screen is where you set up your questions and requests.

Select the L class, S class, and keyword you want to ask about.
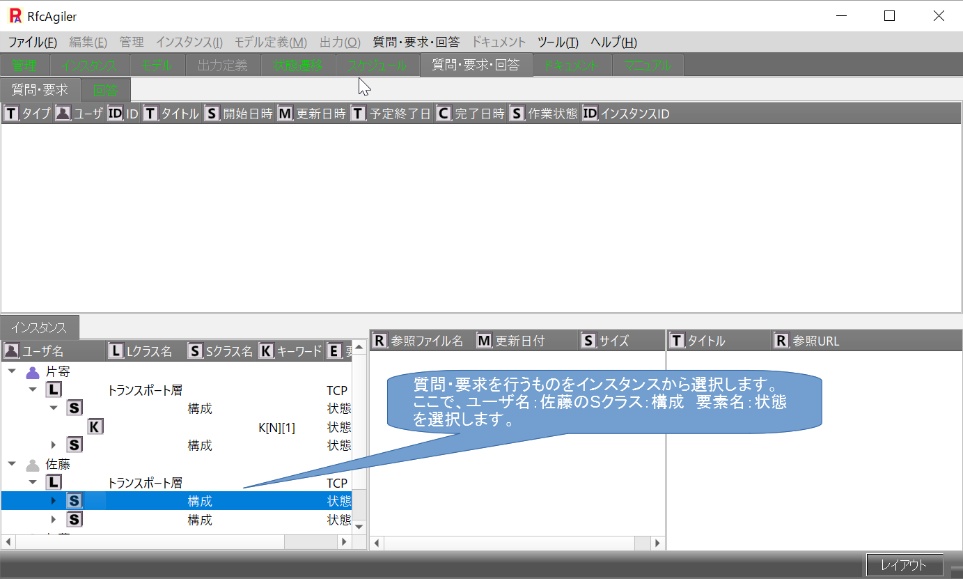
Click Questions, Requests, and Answers, then click New Question or Request.

Alternatively, right-click on the item display screen and click New Question/Request.

The New Question/Request screen will be displayed.

Title:
Question/Request title
ID:
Question/Request ID (Qx-y) (x: user's management number y: sequential number)
Type:
Select question or request. ![]() Click on the combo box to select.
Click on the combo box to select.

Owner:
Your user name is displayed.
User name: kata If multiple names are set, select from kata(1), kata(2),....
As with type, click on the combo box![]() to select.
to select.
Instance ID:
Instance ID of question/request (Ix-y) (x: user's management number y: sequential number)
Set the title of your question/request and click the Add button.
Here, we will use "About the Status" as the title.
Next, a list of users answering will be displayed, so check the users who will answer.

Here, check the respondents and save.
The question and user will be added.
A new message will be added to the question's description.

[Question/Request Item]
Type:
Display of question or request
User:
User name of question/ request
ID:
Question/Request ID (Qx-y) (x: User management number y: Sequential number)
Title:
Question/Request title
Start date/time:
Time the question/request was set
Update date/time:
Time the status was updated and the message was sent
Scheduled end date:
Scheduled end date of the question/request.
If there is a planned end date, click on the planned end date.

A calendar will appear, allowing you to set the scheduled date.
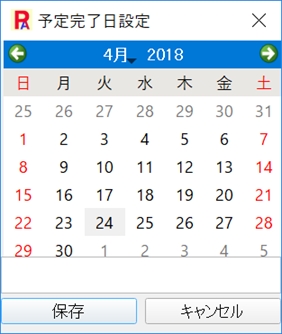
Click the scheduled date and then click the Save button to set it.
Completion date and time:
The time when the question/request status was set to Complete and the Set Status button was pressed to complete it .
Work status:
The initial status is a new message.
The work status can be changed by changing the contents of the Question/Request Status combo box.
Instance ID:
The instance IDs of the L class, S class, and keywords of the instance.
[ Question/Request]
Title:
If you would like to modify the title name, you can edit it to change it.
Changes will be reflected in the question/request item.
Type:
If you would like to change the type,![]() click in the combo box to select it.
click in the combo box to select it.

Once selected, it will be reflected in the question/request item.
Question/Request Status:
If you would like to change the work status, ![]() click in the combo box to select it.
click in the combo box to select it.

Set Status:
Click the Set Status button to set the changed work status.
If you click on Update Message:
Change to Update Message status if you want to update the message.

Click Yes.
The update message will include the update date and time of the question/request item and the work status.

Additionally, an update message will be added to the explanation of the question/request status setting

If you click "Processing":
Confirm your answer and change the status from "Processing" to "Confirming the content".

Click "Yes".
The status of the question/request item will be in progress.

In addition, "In Progress" will be added to the description of the question/request status setting.

If you clicked Cancel:
Change to Cancel when you want to interrupt the process.
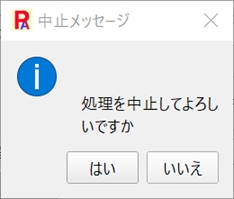
Click Yes.
The completion date and time setting for the question/request item and the work status will be canceled.

In addition, the "Cancel" option will be added to the explanation of the question/request status setting.

If you clicked Complete:
Once the questions/requests are complete, change it to Complete.

Click Yes.
The completion date and time for the question/request item will be set and the work status will be completed.

In addition, "Completed" will be added to the explanation of the question/request status setting.

*When you create a question or request, the working status is set to new message.
Answer User List:
If you want to change, delete, or add an answer user,
click the Answer User List button.
When you create an instance, the list of participating users is displayed on the management screen.
Here is an example of the admin screen:
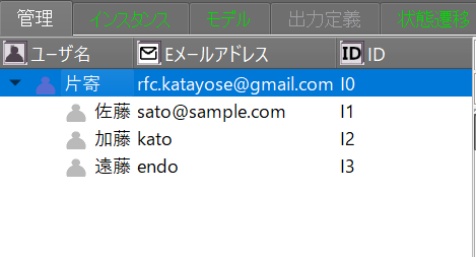
The screen that appears when you click the Answer User List button is shown below.

Setting the answering user:
Check the users who are requested to answer. (Multiple people can be set.)
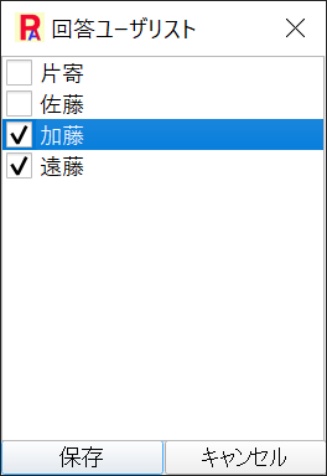
Click the Save button and the changes will be reflected in the questions and requests.

When asking a question/request and answering it as a single person's work:
Since it is a single person's work, the user name for the question and the user name for the answer will be the same.

Click the Save button to create the answering/confirming user.

*You can also set up your own answers.
Delete answering users:
If you no longer need to receive answers from a user, you can delete them.
However, if you have already answered at least one question, you cannot delete them.

Reference file (add, delete, reference):
Reference URL:

Set this if there are files or URLs to reference for the question.
Description:
When you create a question, a new message header will be displayed.

Describe the question or, if there is a reference file, describe its summary.
[Delete Question/Request]
Select the question/answer item you want to delete.
Delete Question/Reque
Click the Question/Request/Answer menu and click Delete Question/Request.

Or, right-click the item and click Delete Question/Request.

The deletion question/request screen will be displayed.

Clicking the Delete button will display a confirmation screen.

Click Yes to delete the item.

However, if you have answered even one question, it cannot be deleted.