 Member-to-member mail function

Member email screen
Open your project (instance of RfcAgiler).
The members are displayed on the management screen.
To send mail between members, select your user name (current status is
yourself) and
click Mail at the bottom right of the screen.
 The email screen will be displayed
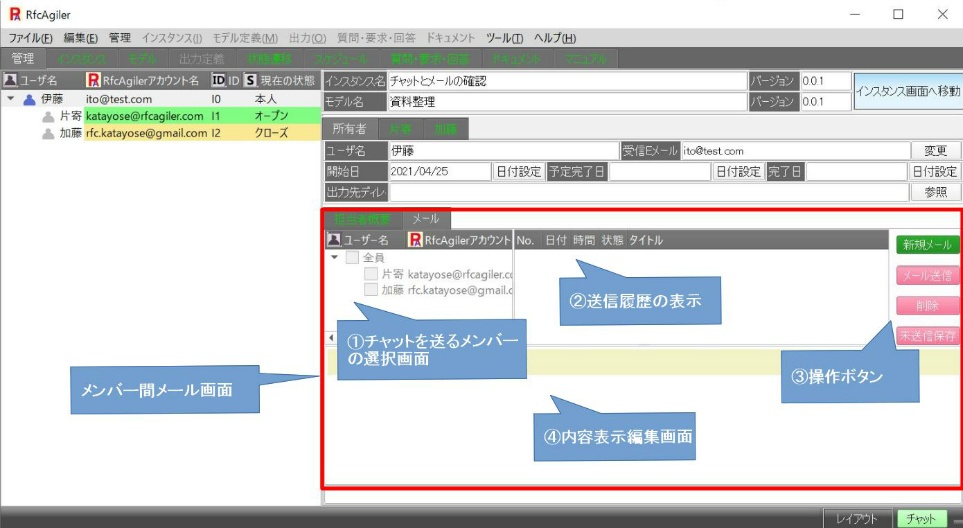
Explanation of (1) to (3)
on the above screen
(1):
Project (RfcAgiler instance) members (user list on the left side of the
screen) are
displayed, and put a check mark on the person to whom
you want to send the email.
When you press New Mail, a check mark will be added to
all of them and you can select them.
(2): Display sent history - The
history of sent emails is displayed.
When you look at other members' email screens,
only the history sent to you is displayed
(3):
Operation button
The
buttons are divided into green and red,
with green being operable and red being inoperable.
a. New mail: In the initial state, it is green and creates a new mail.
When you press the new mail button, the screen to write the title
is
displayed, and after entering the title,
the content display edit screen becomes editable.
In addition, all sending users will be checked and selection of sending
users
will
be enabled.
b.
Mail sent: The initial state is red. Press New Mail so it turns green.
When you have finished composing your email, press the send email
button.
An email will be sent to users with a check mark.
c.
Delete: It turns green when you select the email you are currently
creating or
send history.
If you press the delete button, the mail you are currently composing or
the selected transmission history will be deleted.
d.
Save unsent: Turns green while composing new mail.
If
you want to save the email you are creating, press the save unsent
button
Flow from creating to sending
(1)
Press
 button.
The
title setting screen is displayed.
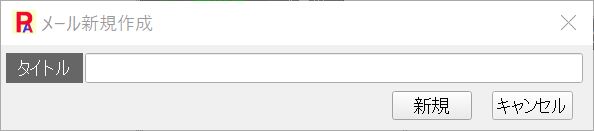
Set
the title and press the "New" button.
For example,
set "Regarding the next meeting time in chat".
(2) New email creation
start screen
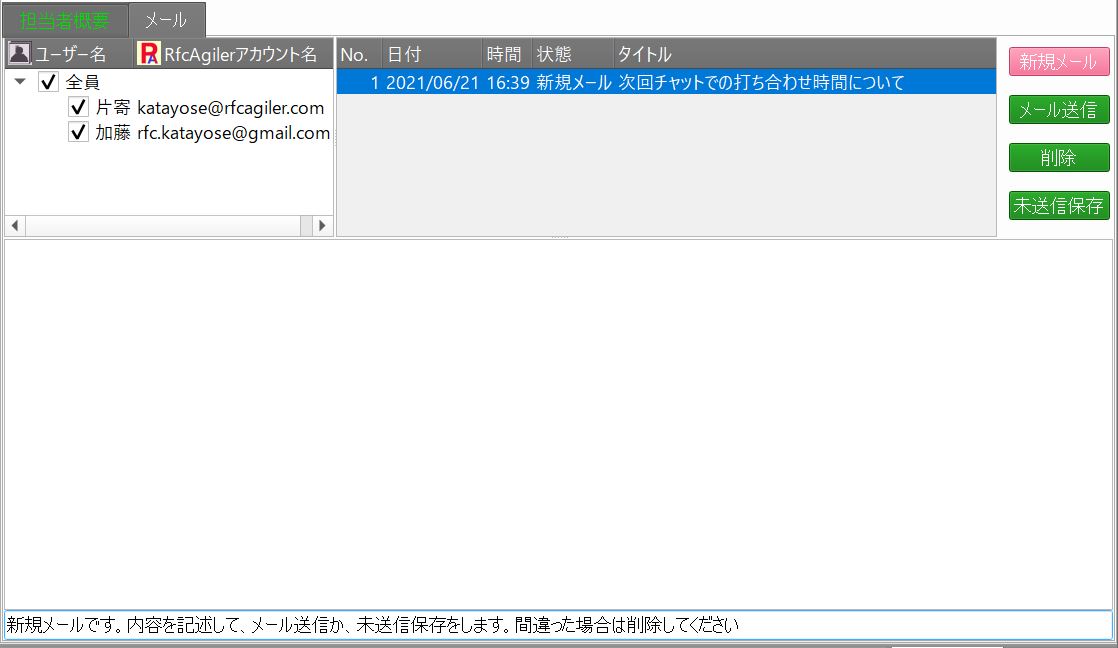
In the user list, everyone has a check mark and
the initial state is
to send to everyone.
The title set in the mail history is displayed and
the status is
"new mail".
(3) Composing a new email
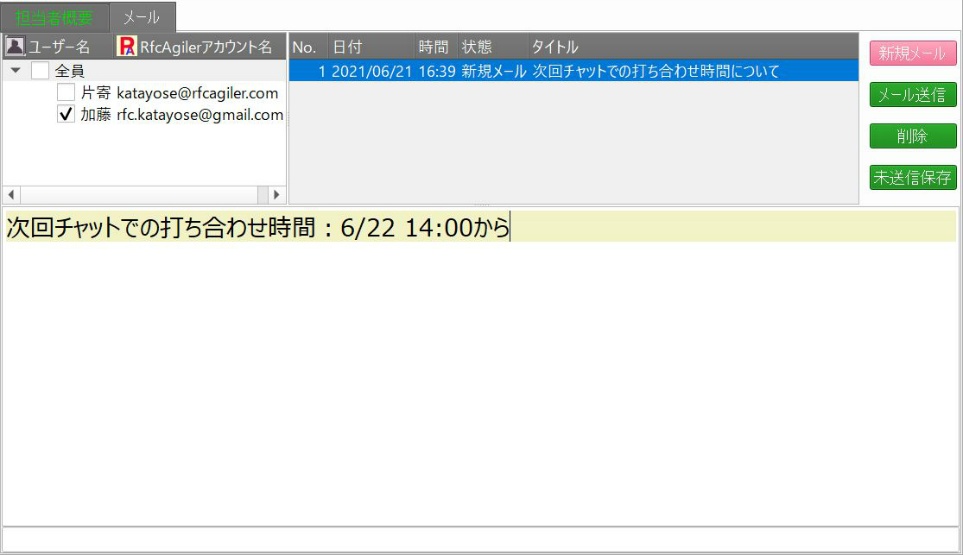
Select the user you want to send
(here, select only Mr. Kato who
does not have a project open).
Write the content of the email
(4) Sending e-mail
Press the send email button.
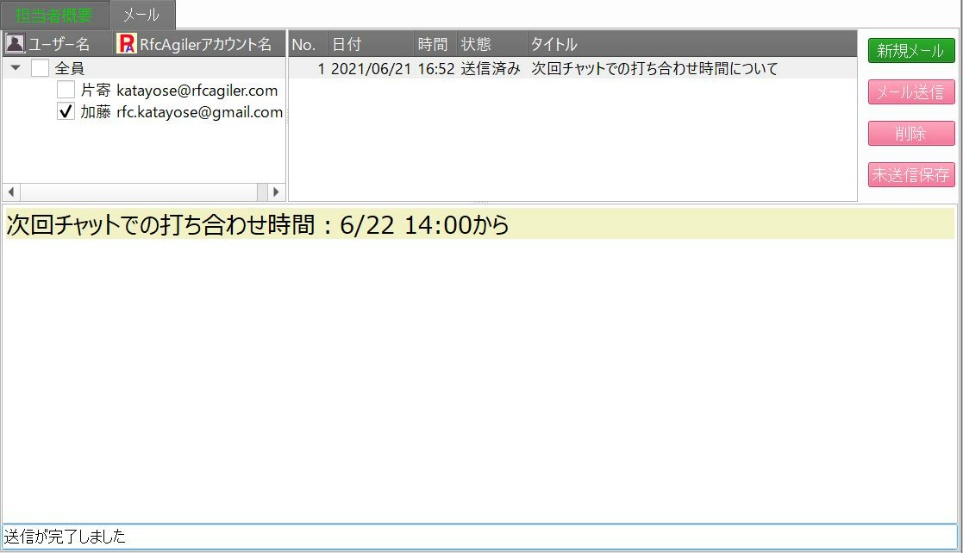
You will see the message "Send completed" at the
bottom left of the screen.
The status of the history has been updated to "Sent"
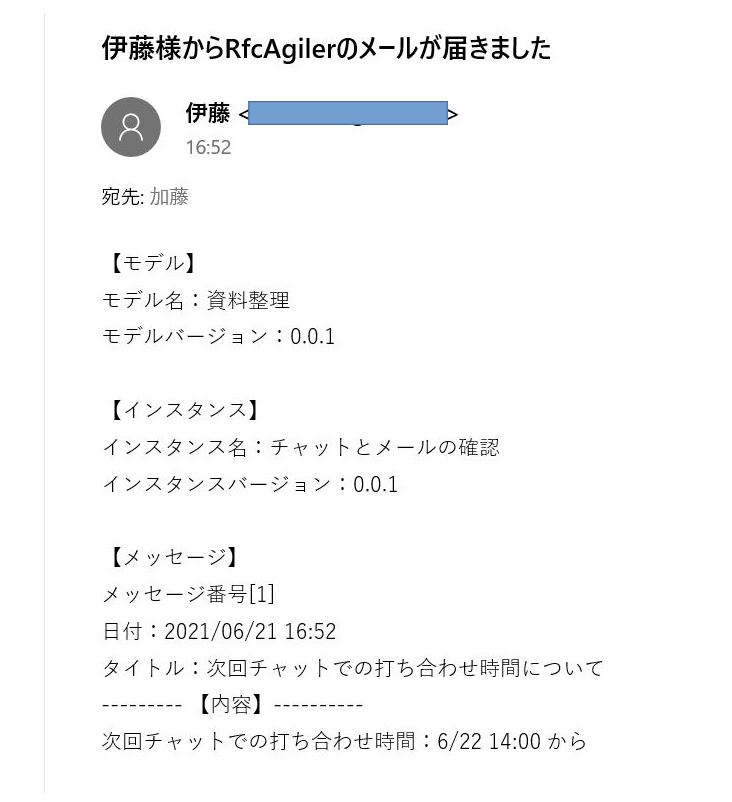
Sent email content (Here, it is sent to Gmail)
If you choose a username other than yourself
Select
a username other than yourself and click Mail
at the bottom right of
the screen.
No., date, time, status, and title history information are
displayed.
What is displayed is the history information of the mail sent to you
by member-to-member mail.