 Sample
 Sample
Click download sample below.

A sample download screen will appear in your browser.
Follow your browser's instructions to download the sample.
【Sample
description】
1.Unzip
the sample file
Unzip the downloaded file: RfcAgilerSample.ws.zip.
Set the decompression destination to any directory (here: c:\work).
After unzipping, you will see the RfcAgilerSample.ws directory.
The RfcAgilerSample.ws directory contains the rfcagiler.def directory
and the rfcagiler.prj file.
Inside the rfcagiler.def directory are model, instance and
output definition information.
The rfcagiler.prj file is the file that determines the workspace when
opening
models, instances, and output definitions.
For Linux: Open a terminal and unzip with upzip -Ocp932.inux
>unzip -Ocp932 RfcAgilerSample.ws.zip
2.Launching
RfcAgiler
Launch RfcAgiler.

3.model
open
Click
"Open Model" in the menu.

The Open Model screen will appear.

Click the workspace browse button.

Move to the subdirectory of the RfcAgilerSample.ws directory
to the unzipped location (c:\work here).
Select the rfcagiler.prj file and click Open.
The RfcAgilerSample.ws directory is displayed in the workspace
of
the Open Model screen, and the models
in the RfcAgilerSample.ws directory are displayed.
Here
you see version 0.0.1 of the communication protocol.
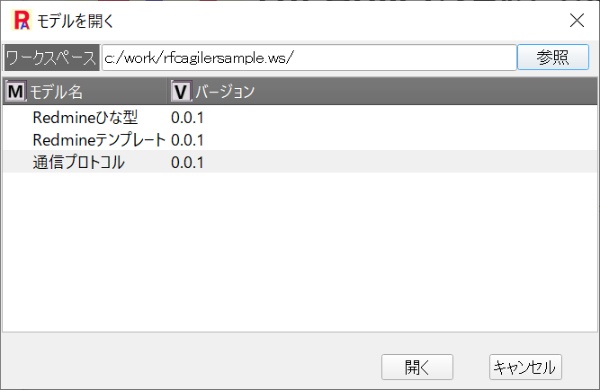
Select Communication Protocol Version 0.0.1 and click
Open.
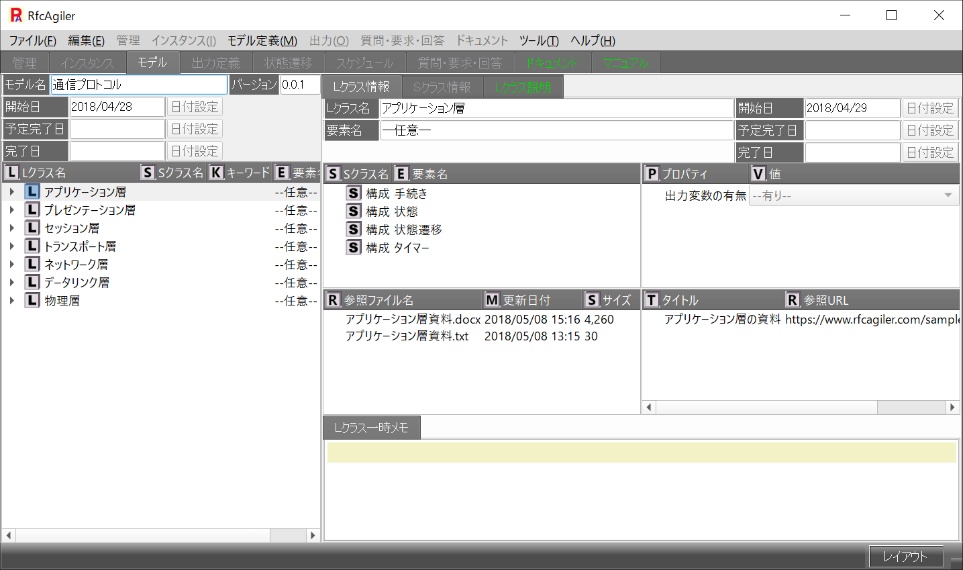
A model screen appears.
For model operation, refer to
the manual "5. Model".
The owner of the model is only a reference because
the @ is not attached to the email address,
but you can transfer the owner to yourself.
To
transfer ownership, click Ownership Transfer
in Model Definition in the menu.
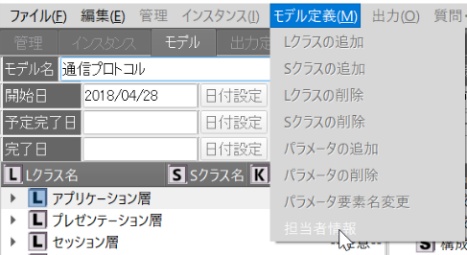
Since
the owner's e-mail address is an e-mail address
without @, you can click the transfer responsibility
button.

When
you click the transfer responsibility button,
the model definition owner transfer screen is displayed.

If you want to make the edits yourself, select your
registered email address and click the transfer button.
The model screen is closed and the initial screen appears.
4.
open instance
Click Open Instance on the menu.

The Open Instance screen will appear.
Once the workspace is
configured, you will see the model name and instance name
in the configured workspace.

Click
the Open button to display the instance screen.
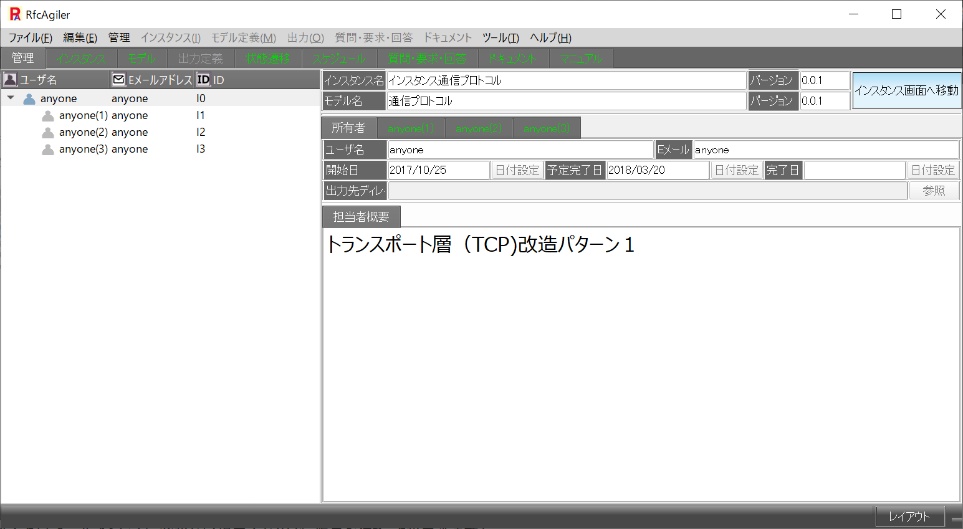
Here,
all four of them are in charge without @ in their e-mail address,
so
they cannot edit.
To enable editing, select Ownership Transfer
in Menu Management with the username of your choice.
First, transfer the top responsibilities.
This person in charge
can change all the persons in charge below.

Click Transfer Ownership.

When
you click the transfer button, it will be transferred to
Katayose (actually, your own email address) and the management
screen will be closed and the initial screen will appear.
When
you open the instance again, the person in charge of anyone
on the management screen will be changed to Katayose.

Username:
Katayose can manage (add, delete, transfer) other users.
Transfer responsibility if another user is registered.
If no other user is
registered, anyone else will also transfer to my user.
Here we transfer all users to ourselves.
To
transfer, select anyone, select the menu
"Administration" - "Transfer", and perform the same process as above.
The result of transferring everything one-sidedly is
as follows.

Clicking on the Instances tab or Go to instance screen on
the administration screen will display the instance screen.
Editing
can be done by the person in charge: Katayose.
For details on how to operate instances,
refer to the manual "6. Instances."
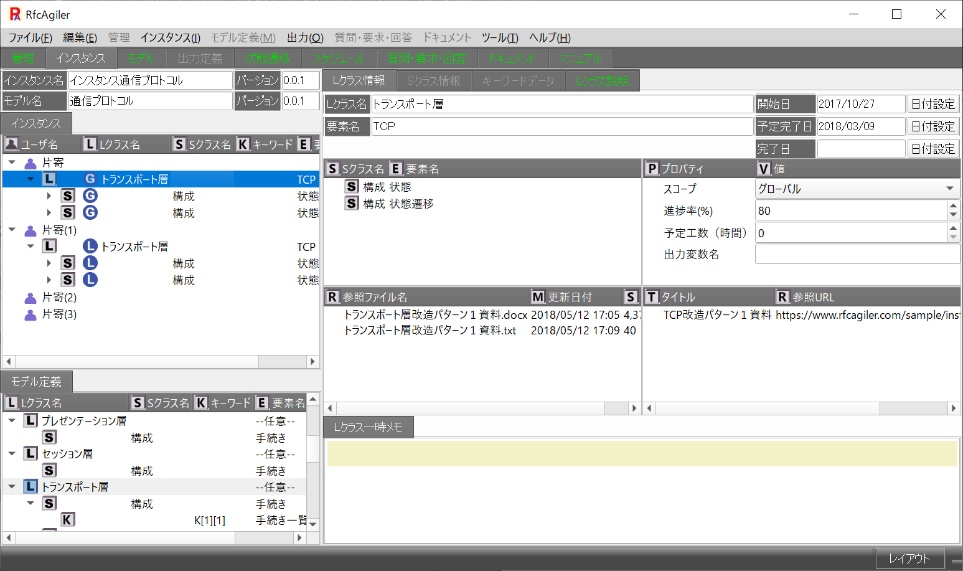
5. State
transition
This is created by the state and state transition keywords of
the S class configuration of the transport layer of the L class
of the instance.
For state transitions,
please refer to "7. State Transitions" in the manual.
Click the state transition tab.

Click
to see the state transition diagram.
Since you are in charge, you can edit (move the status).
The
figure below is the person in charge: Katayose.

Person in charge: Katayose (1) is also my own email address,
so it can be moved.
Click to display the state transition diagram,
and move to it.
The figure below is the person in charge: Katayose (1).

This is the initial, non-moving state.
Drag the state name to move it.

6.
schedule
You can also see the schedule by opening the instance.
Navigate to the schedule by clicking the Schedule
tab.

For the schedule, please refer to "8. Schedule" in
the manual.
7.Question/Request/Answer
When you open an instance, you can also refer to
/update questions/requests/answers.
On the question/request screen, select the instance you want
to ask a question about and set the details.
Select
a user to answer from the user list and get the answer.

The
answer screen displays questions that other users have
asked you to answer.
In this case, it is not displayed because
we
set all users as ourselves.

For
questions/requests/answers, please refer to
"9. Questions/requests/answers" in the manual.
8.Document
Documentation includes model documentation and instance
documentation.
The model document is shown below.
Model documentation can be moved to the documentation tab
when you create or open a model or when you create or open
an instance.
When only the model is created or opened,
it can be updated by the person in charge.
Others are for reference only.

For
the model document, refer to the manual "11. Document".
The instance document is shown below.
Instance documents can be moved to the document tab
when the instance is created or opened.
You can update if you are an administrator of the instance.
Others are for reference only.

9.output
definition
Click "Open Output Definition" in the menu.

The Open Output Definition screen is displayed.
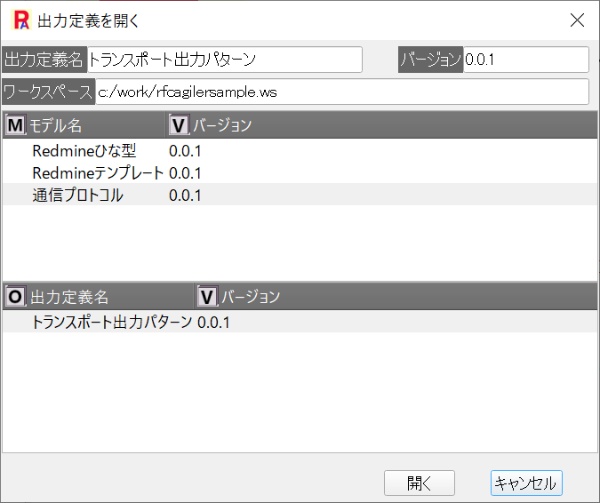
Click the open button.
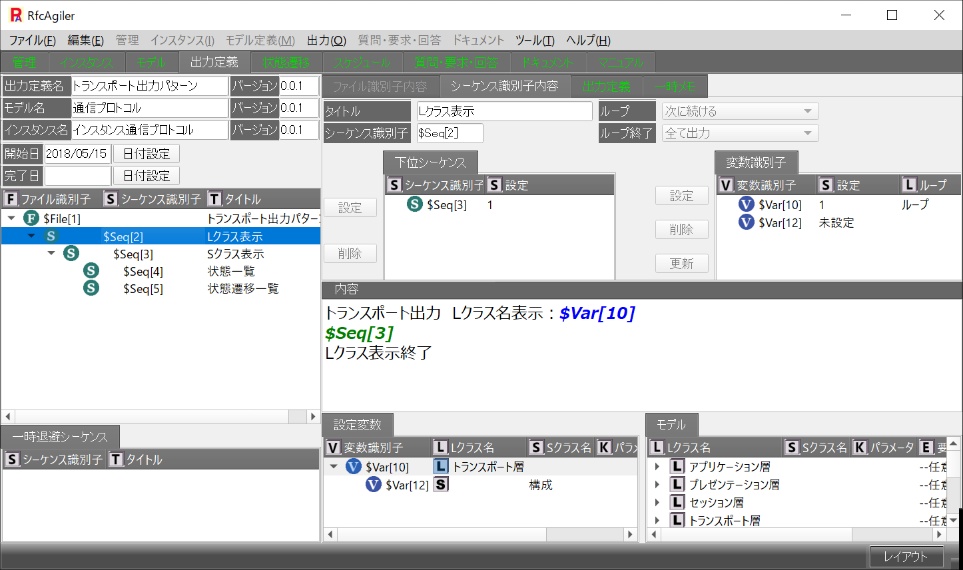
To make it updatable, click Menu: Contact Information
in Output.

Displays
output definition owner information.
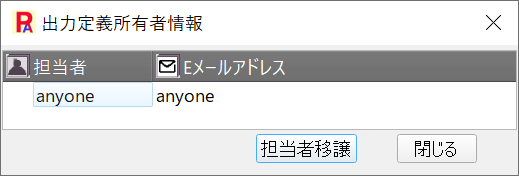
Here,
click Transfer Ownership.
However, if the instance is open,
the person in charge cannot be transferred,
so close the instance once and then open the output definition.

Click the transfer button and it will be transferred to your email
address katayose@rfcagiler.com.
For output definitions, see "9. Output Definitions."